You have racked the nodes and you have configured your network ports. The requirements are the same as when using the foundation applet or foundation VM. One thing that has caught me out once or twice before with re-imaging is that I connected all my network cabling upfront. In my case that is a 1 Gbps for IPMI and 2 x 10 Gbps for all my management and data networks. Ensure you disconnect your 10 Gbps cabling and only connect your IPMI connection to the shared 1 Gbps network port.
The expand procedure is quite straightforward:
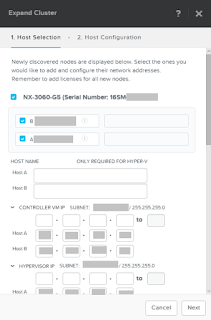
- Log in to PRISM and go to gear icon
- Select expand cluster. On the screen tick boxes of nodes you want to add. Enter the required IP for CVM and hypervisor
- Select the hypervisor version you want to use
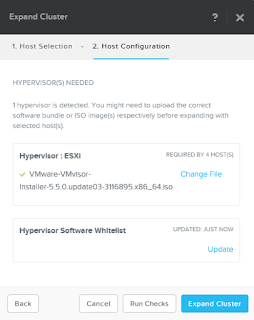
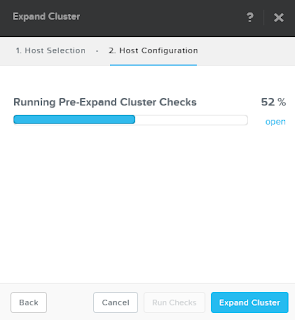
- Click the run checks button and the pre-check will start.
- When done expand cluster.
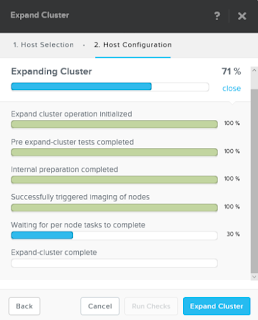
- Just sit back and wait for everything to complete


I want my hostnames to be consistent so I will need to change a few things
- SSH into your ESXi host
- Change hostname with 'esxcli system hostname set --fqdn <name>' command
- Restart genesis on all nodes 'allssh genesis restart genesis'
- You may also want to execute service hostd restart on your ESXi nodes
Although the nodes are added to the cluster, the ESXi hosts will not automatically mount the existing datastores. This can be easily done via PRISM though.
- Go to Home > Storage > Table > Container
- Select the datastore and click update
- Make sure mount/unmount ESXI hosts is selected
- Tick the box next to the new host and click save
One other thing I'd like to see build into the Expand cluster wizard is the ability to set CVM size. Currently it will be done with the default which caused dedupe to be disabled on the cluster. Here is the fix:
- Shut down the CVM with 'cvm_shutdown -P now' command
- Change the RAM size to what is required for dedupe. You wan the CVM memory sizes in your cluster to be conssitent
- Power on CVM
- SSH into CVM
- Run edit-zeus --editor=vim
- Remove the line that says "disable_on_disk_dedupe: true"
- Save the file and quit vim
At this point I am ready to make some changes in vCenter. I want to ensure that I am making use of 10 Gbps networking and that my vmk and CVM are running on my distributed switches. I won't be going into much detail on this but the Add and Manage Hosts wizard is your friend.
The last thing I had to clean up is some red herring alerts I got from PRISM. It will tell you that the 1 Gbps interfaces are down. You can fix this by following the steps in this KB
And that is pretty much it. I have used this process a few times now with ESXi and AHV and I think it is fantastic!
No comments:
Post a Comment