In this post we will concentrate on deploying VM on the hypervisor VMware. The reason being that I work for an organisation who uses VMware extensively.
Before we get into the CALM configuration there are a few things we need to cater for in the VMware environment. First we need to create a role with the required permissions. You can find these on page 52 of the CALM admin and operations guide. For the purposes of this exercise I specified an account with admin role but you do not want to do this in production.
First we will need to create a storage cluster in vCenter and assign your Nutanix datastore to it. Actually you only have to do this if you want DRS to do the initial placement of the VM. You could skip this step and just select an individual host instead of DRS cluster. More about this later.
- Log into vCenter and go to Datastore view
- Right click datacenter and select Storage > New Datastore Cluster
- Enter a name and ensure Storage SDRS is enabled
- Under Cluster and Hosts, select your cluster
- Under Datastores, select your Nutanix datastore
Over to Prism Central, we need to do is adding a provider.
- Go to Settings > Providers > Add Provider
- Set name for provider
- Set type to VMware
- Add vCenter server, username and password
- Specify 443 as port
- Enter datacenter
- Click save and verify

With the provider in place we can create a project.
- Set credentials. Click Save
- Under VM Configuration, Select VMware
- Under Windows, enable DRS Mode. Select cluster, template and storage pod
- Under instance name, I have enter the @@{vmname}@@ macro. I will explain this in more detail as we progress
- Change the value for CPU and Memory as desired. Click the running man if you want to have ability to alter the values.
- Leave the other defaults for now
- Enable Check login upon create and set credential to calmadmin
- We will leave the Linux config for now.
- Click Save

You are now ready to create your firs blueprint so jump over the blueprint section
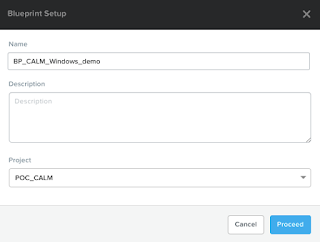
- Click create the new blueprint button and select multipod VM. CALM 2.6 has some issues with single VM option.
- Enter name and project and click proceed
- You are now in the blueprint editor
- On the right under Application Profile Name, specify "vmname" under name and tick the runtime option. This will allow to specify VM name upon creation as I specified @@{vmname}@@ as an instance name in the environment setup.

- Click the plus sign next to service and enter a name.
- Select VM and set Cloud to VMware and OS to Windows
- Click Clone from Environment. This will take the values from your default VMware config.
- All values should be pre-entered but you will need to add another credential under connection.
I basically re-created the calmdmin credential as we did in the environment.

Now you are ready to launch your first VM with CALM.
- Click the launch button in top right corner of the editor
- Give the application a name and specify a name for your VM under the vmname variable

- Click create
- The provisioning will start and you are taking to the application provisioning screen

- When the status on the overview tab changes to running your VM has been deployed successfully.

Now that your VM is up and running, let's explore some of the other tabs on the application screen.
The manage tab allows you to do action such as start, restart, stop and delete. When you click on the action the play and eye button gets enabled. Once you click the play arrow the selected action will be undertaken. The services tab will allow you to see your VM's configuration. Finally we have the audit button, which is useful to follow the deployment process and allows you to see what went wrong, if anything.
This was a very simple example that may not reflect a real world use but it will get you started. You will probably find that you need to do some customisations to your VM, such as adding it to a domain, so in a future post I will discuss how to utilise customisation such as sysprep and VMware custom specs.


