Traditionally my employer has been making use of the traditional server + shared storage approach to host our virtual infrastructure. Back in the early days we were limited to a virtual infrastructure and shared storage on the primary site only but as DR became more important the same infrastructure got implemented at a remote site. Having VMware as hypervisor of choice and Netapp as a filer solution, Site Recovery Manager was the obvious choice. Over the last few years we have seen some change in the way we deliver virtual servers. Although the main share of virtual servers are still delivered on the server + shared storage platform we are increasingly making use of the Nutanix Xtreme Computing Platform. The services we hosted on Nutanix initially were pre-prod and development in nature but we are so impressed with the product that we are now using it for production environments.
Introducing a hybrid environment comes with some challenges. Protecting workloads on Nutanix to a Netapp based environment at the recovery site means that you can no longer make use of the Netapp snapmirror technology. Implementing a Nutanix solution at the recovery site is not an option at this stage. One way to do this is replicating the workloads at the VM level. Although there are several products that can do this we did not look past vSphere Replication. It is included with the existing ESXi licensing and more important it integrates with the existing Site Recovery Manager implementation.
The vSphere Replication is pretty straight forward. Just make sure you check the compatibility list for version info on vCenter and Site Recovery Manager.
Install
- Download the appropriate ISO from VMware
- Connect ISO to your workstation and import OVF
- Give your appliance a name and set the location
- Accept the default deployment configuration
- Specify storage location and set disk format
- Connect appliance to the desired port group
- Set password for the appliance
- Take note of the vService bindings

- Click finish and power on VM
Configuration
- Browse to http://<your appliance>:5480
- Log in with root user and password you specified during install
- Go to System > Time Zone and set accordingly

VM Protection
Now that your appliances are up and running at both ends it is time to start protecting some of your VM.
- Click on VM you wish to protect. All vSphere Replication Actions > Configure Replication
- Click replicate to a vCenter

- Click Add Remote Site and enter details

- Accept the security warning
- Select the added remote site and click next

- The replication server will be auto assigned. Click next.

- Select a target location for your VM and click next

- Don't set guest OS quescing unless required
- Configure RPO as desired and click next.

- Click finish
- Go to vCenter > Manage > vSphere Replication. Here you can verify your configuration
- Goto vCenter > Monitor > vSphere Replication. Under outgoing Replications you can see the status

- Log into your recovery site's vCenter
- Go to vCenter > Monitor > vSphere Replication
- Right-click the VM and select Recovery

- A recovery wizard will appear which allows you to select Recovery Options, Folder, a destination host. You will be informed that the network devices of the recovered VM will be disconnected.
- Connect to desired network and power on

vSphere Replication does not allow automated failback but you can reconfigure the replication in reverse direction thus from secondary site back to primary. If the disks are still available on the primary site you can use these as replication seeds and only sync the changed blocks
- Ensure that the VM has been removed from inventory at primary site
- Select the VM on the recovery site and configure replication. Choose replicate to vCenter Server.
- Select the primary vCenter server
- Under target location you need to ensure that you point to the volume that holds existing disk. In addition, under target allocation, you will need to point to the existing VM folder. Otherwise you will not be making use of replication seeds

- Configure the remaining settings to your liking.
- When recovering the VM at the primary site again you will be informed that the vmx config file already exists. Click yes
- You should now be able to recover your VM again

SRM Integration
One of the benefits of vSphere Replication is that it integrates with Site Recovery Manager. Just like with SRA, you can create protection groups and recovery plans.
- Configure your VM for replication has you did in previous steps
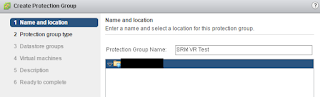
- Create a new protection group under SRM
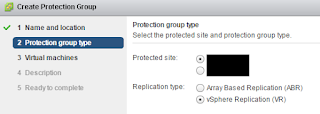
- Under protection group type, ensure you specify vSphere Replication
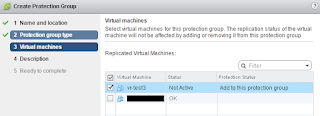
- Add the VM to the group
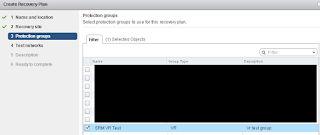
- Create new recovery plan.
- Specify the recovery site
- Specify the Protection Group you created previosuly
- Select your test networks. The default setting is isolated and this will create a new vswitch with no connections
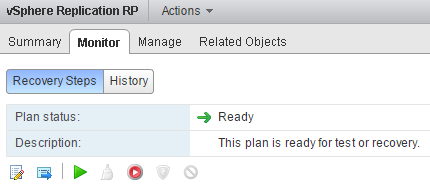
- You can now run your test plan by clicking the green arrow.
- As a test I added a txt file to desktop. I now opt to replicate recent changes to recovery site
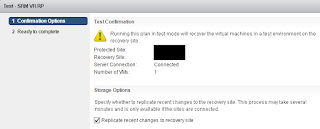
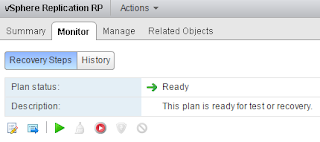
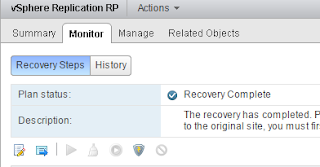
- The SRM window will show test is in progress. You can monitor progress under the recovery plan > monitor > Recovery steps.
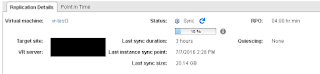
- Under vcenter > Monitor > replication you can also see that the sync is in progress.
- Once the sync is completed the VM will be powered on
- I have verified my VM has been recovered and can see that my modified file is on the desktop.
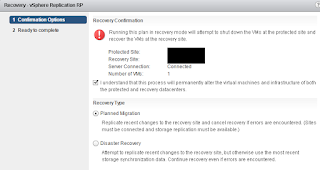
As you can see it is pretty straight forward to integrate vSphere Replication with Site Recovery Manager. Running a recovery is not all that different from a test but obviously its impact is significantly different hence the reason you need to click the checkbox and you get presented with a big red circle.
- Go to your recovery plan and click the red circle.
- Make sure you understand the consequences. Read and click the checkbox. Click next and finish.
Assuming all goes well your virtual machine is now running from your recovery site. You probably want to re-protect your VM as this will allow you to send your workload back to the original site.
- Click the lightning bold shield
- Confirm that you want to re-protect your VM. Click the checkbox. Click next and finish
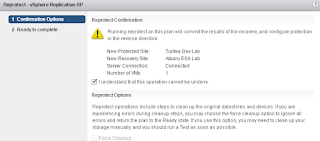
One thing to keep in mind here is that when you do a re-protect on a protection group that makes use of vSphere Replication it will do a full sync replica. There appear to be no option to make use of replication seeds as you can with non-SRM integrated vSphere replication. If you do have the solution, let me know


As you can see it is pretty straight forward to integrate vSphere Replication with Site Recovery Manager. Running a recovery is not all that different from a test but obviously its impact is significantly different hence the reason you need to click the checkbox and you get presented with a big red circle.
- Go to your recovery plan and click the red circle.
- Make sure you understand the consequences. Read and click the checkbox. Click next and finish.

Assuming all goes well your virtual machine is now running from your recovery site. You probably want to re-protect your VM as this will allow you to send your workload back to the original site.
- Click the lightning bold shield
- Confirm that you want to re-protect your VM. Click the checkbox. Click next and finish


One thing to keep in mind here is that when you do a re-protect on a protection group that makes use of vSphere Replication it will do a full sync replica. There appear to be no option to make use of replication seeds as you can with non-SRM integrated vSphere replication. If you do have the solution, let me know
This comment has been removed by a blog administrator.
ReplyDeleteThis comment has been removed by a blog administrator.
ReplyDelete