Monday, 5 August 2019

CALM Series Part 2: Deploying Windows VM on VMware

Now that you have installed CALM successfully in part 1, it is time to put CALM to some good use.
In this post we will concentrate on deploying VM on the hypervisor VMware. The reason being that I work for an organisation who uses VMware extensively.

Before we get into the CALM configuration there are a few things we need to cater for in the VMware environment. First we need to create a role with the required permissions. You can find these on page 52 of the CALM admin and operations guide. For the purposes of this exercise I specified an account with admin role but you do not want to do this in production.

First we will need to create a storage cluster in vCenter and assign your Nutanix datastore to it. Actually you only have to do this if you want DRS to do the initial placement of the VM. You could skip this step and just select an individual host instead of DRS cluster. More about this later.

  • Log into vCenter and go to Datastore view
  • Right click datacenter and select Storage > New Datastore Cluster
  • Enter a name and ensure Storage SDRS is enabled
  • Under Cluster and Hosts, select your cluster
  • Under Datastores, select your Nutanix datastore

Over to Prism Central, we need to do is adding a provider.

  • Go to Settings > Providers > Add Provider
  • Set name for provider
  • Set type to VMware
  • Add vCenter server, username and password
  • Specify 443 as port
  • Enter datacenter
  • Click save and verify


With the provider in place we can create a project.

  • Go to Projects and click the Create Project button
  • Enter Project Name
  • Under Infrastructure, Select Local only
  • Set your VMware provider accordingly and Save


Now jump over to the environment tab. We will be setting some default configuration to use in your blueprint

  • Set credentials. Click Save
  • Under VM Configuration, Select VMware
  • Under Windows, enable DRS Mode. Select cluster, template and storage pod
  • Under instance name, I have enter the @@{vmname}@@ macro. I will explain this in more detail as we progress
  • Change the value for CPU and Memory as desired. Click the running man if you want to have ability to alter the values.
  • Leave the other defaults for now
  • Enable Check login upon create and set credential to calmadmin
  • We will leave the Linux config for now.
  • Click Save


You are now ready to create your firs blueprint so jump over the blueprint section

  • Click create the new blueprint button and select multipod VM. CALM 2.6 has some issues with single VM option.
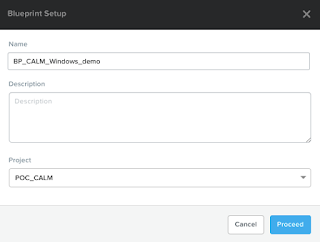
  • Enter name and project and click proceed


  • You are now in the blueprint editor
  • On the right under Application Profile Name, specify  "vmname" under name and tick the runtime option. This will allow to specify VM name upon creation as I specified @@{vmname}@@ as an instance name in the environment setup.


  • Click the plus sign next to service and enter a name.
  • Select VM and set Cloud to VMware and OS to Windows
  • Click Clone from Environment. This will take the values from your default VMware config.
  • All values should be pre-entered but you will need to add another credential under connection.
    I basically re-created the calmdmin credential as we did in the environment.
Now you are ready to launch your first VM with CALM.

  • Click the launch button in top right corner of the editor
  • Give the application a name and specify a name for your VM under the vmname variable


  • Click create
  • The provisioning will start and you are taking to the application provisioning screen


  • When the status on the overview tab changes to running your VM has been deployed successfully.


Now that your VM is up and running, let's explore some of the other tabs on the application screen.
The manage tab allows you to do action such as start, restart, stop and delete. When you click on the action the play and eye button gets enabled. Once you click the play arrow the selected action will be undertaken. The services tab will allow you to see your VM's configuration. Finally we have the audit button, which is useful to follow the deployment process and allows you to see what went wrong, if anything.

This was a very simple example that may not reflect a real world use but it will get you started. You will probably find that you need to do some customisations to your VM, such as adding it to a domain,  so in a future post I will discuss how to utilise customisation such as sysprep and VMware custom specs.

CALM Series Part 1 - Enabling CALM

CALM provides advanced app-level orchestration across teams and clouds while eliminating the complexity and repetitive nature of resource delivery via comprehensive app-centric automation from Nutanix Calm. With demands on IT rising faster than ever, Calm enables you to streamline how you manage applications and support the business.

That is CALM in a nutshell, and I assume you have looked at the official documentation, but I just want to get my hands dirty and get started. Actually I did get started about a year ago but due to time constraints I never got anywhere with it. I am not sure what version of CALM was in use at the time but I do remember thinking that it was not overly mature and too complicated for my liking....

Enabling CALM is a piece of cake. Basically there area few pre-requirements:

  • Configure a data service IP on the cluster running Prism Central
  • Register this cluster with Prism Central
  • PC VM needs to have hot add memory enabled
  • PC needs to be AOS 5.9 or higher and the cluster it is running on it needs AOS 5.5. or more.

And now for the configuration of CALM itself:

  • Log in to PC as an Admin
  • Under Services > CALM, click Enable
  • Enable App Management. Notice how it will add 4 GB to your PC VM


  • Click save. The CALM interface will appear

Let's check if a newer version is available. Upgrading CALM is super easy thanks to one of my favorite Nutanix features, Life Cycle Management.

  • Go to Settings > Life Cycle Management
  • Perform an inventory update
  • Once completed, go to Software Updates
  • Select both the CALM and Epsilon features and click Update


  • Take note that genesis will be restarted and click Apply 2 Updates


  • The process will take a while but all going well you should see the following


And that is it! You are all set to start with CALM. Stay tuned for more posts.

Saturday, 15 June 2019

NCAP exam - Experience and thoughts

The weather has not been to all that over the last few weeks here in New Zealand. As it is winter here it us pretty much to be expected. In the weekend I usually hit the local mountain bike tracks but after the rainfall over the last two weeks it is like riding in peanut butter. So instead of riding I decided to take my Nutanix Certified Advanced Professional exam instead and I am pleased to say I passed.

I have always been a fan of industry certificates. I believe you learn a lot in the process and while it may not always get you the next job I do believe it adds tremendous value to your CV. Like most other vendors, Nutanix also offers a certification path. If my memory serves me correctly, I believe they started with certifications in 2014 and although I have no idea how many people are certified these days, I managed to become Nutanix Platform Professional #180. I kept up to date when they upgraded to NPP4 and 5. When the new Nutanix Certified Professional track was announced I was having too much fun on the mountain bike and upgrading was not a priority.

During .Next in Anaheim, Nutanix offered free certification during the conference and that got me excited enough to review the training course and materials. I registered for the NCP exam as soon as I arrived and managed to pass without too many issues. NCP was a fun exam. Very similar to NPP when it comes to difficulty but the big difference is that it is no longer open book. While I sat my exam I was sitting close to the proctor's table and I was surprised to see that a large chunk of people failed. Now this could have been for any of the exams offered not just NCP.

Since there was still a day to go at the conference I was persuaded to give NCAP a go. I knew I would surely fail without looking at the blueprint let alone no study. I was told that the NCAP exam was about 30% harder than NPP. So I sat the exam and has expected failed. 2600 out of 5000 with a passing score of 3000. The exam focused heavily on Metro Availability, Prism Central, CALM, AHV Networking, ABS and AFS.
My employer's choice of hypervisor is ESXi and we do not use any of the other features in anger so haven't done any study I thought I was pretty close. Good thing was that you also got a voucher for 50% off on the next attempt. A saving of USD 100.

When I got back to New Zealand I downloaded the blueprint and started studying everything that is in there. I decided to give myself a month before taking the exam. I read all the guides and watched the videos that were linked to blueprint and wrote down what I thought was most useful in a notebook. In the last week I have been mainly reviewing, not just my notes but also working with the product.

My exam was scheduled for 9 AM and this was my first time doing an online proctored exam. You can actually launch the exam 30 minutes before or after scheduled time. I recommend you launch it 30 minutes earlier as there is still a bit of work to do. First I needed to download and install PSI secure browser. Once that was done I had to take a scan of an ID and a picture of myself. Finally, I had to scan the room with the webcam. They are pretty strict as to what you can and can not have in the room so I booked a meeting room and locked the door.

I had a pretty good idea has to what was going to come my way and I had studied the sections that I had no clue about in attempt one. Although I was more confident in some of my answers I was still struggling with quite a few. You are allowed 150 minutes and I used all of them. I reviewed all the questions I was not sure about multiple times and changed a few in the end. When I was finished I was relieved to see that I passed.

I like the exam. It is fair and definitely achievable. The best training resource is to do exactly what the blueprint provides. And hand on experience of course!! I suggest you get to know CALM, PRISM Central, AHV (especially networking), AFS and ABS inside out. Getting to work with these technologies hands on will help tremendously. Other than that pay attention to the wording. Sometimes the difference and answer lies in the wording. Pay close attention to questions on the same subject later in the exam. Sometimes it includes a hint to the right answer in a previous question.

Good luck!!


Friday, 31 May 2019

Getting started with Karbon

If you look at Nutanix' solution brief for Nutanix Karbon it says "Who knew Kubernetes could be so simple?" and yes it is that simple!

I don't know much about containers and I still struggle to see many uses for them. Regardless of what I think, my manager is keen to explore its abilities and provide support if our developers want to use them. I had to start from scratch and do a lot of reading. To get familiar with all the jargon I started playing around with Docker and Kubernetes on my MAC. Very easy to install and you will be creating containers in no time. Having access to an enterprise Azure subscription I started looking at their offerings. Azure Container Services is no longer available and has been replaced by Azure Kubernetes Services. I did manage to get AKS to work but not without involvement from Microsoft Support. Too complicated and time consuming for me. I also feel that financially AKS may not be the cheapest option.

How about setting up a Kubernetes cluster on prem? Yes, tried that too. I deployed 3 Centos VM and installed Kubernetes on top of it. There are some great references on how to do this but again I found it complicated and time consuming, took me a few days. Although it all seems to work as expected, this is definitely not a setup I would take into production.

Being a big Nutanix customer it made sense to look into Nutanix Karbon and as with all things Nutanix it is supposed to be simple to install. When I first looked at Karbon it was still a technical preview and although I could see immediately that it would be a whole lot simpler to get up and running I did run into some issues. My deployments did fail and I had to get support involved. The things that were highlighted by support were:


  • Upgrade to latest PRISM
  • Upgrade AOS
  • Disable proxy settings
  • Limitation in networking port groups returned.

In the mean time Karbon had gone GA so before dealing with the above I updated Karbon via LCM. Worked flawlessly. I am a big fan of LCM and if you attended .NEXT you may have seen me on stage during the LCM session.

Upgrading PRISM and AOS was a breeze as per usual. The proxy settings need to be disabled for Karbon to work. This is a known issue and hopefully will be solved before too long. I have a requirement for a proxy in my environment and when I disable it I cannot upgrade my components.
We also encountered an issue where I could not select correct network for node VM. This was due to the fact that I have many network ports in my ESX environment and the Karbon UI did not like that.  We worked around this issue by prefixing network name with AA

Let's have a look at the install of Karbon...


  • Log into PRISM and go to Services > Karbon
  • Enable Karbon


  • Click upload file and change image name to acs-centos and click save


  • Click create cluster and select Development cluster


  • Enter name for K8s cluster and specify Nutanix cluster


  • Specify network. I have also changed the worker resources to 2 from the default 1 instance


  • Accept the defaults for networking


  • Enter your credentials and accept the other defaults. Click create


  • Once your cluster is deployed you should see a green heart your cluster has been deployed successfully.


  • Select the cluster and from actions menu, download kubeconfig


  • You can set your KUBECONFIG variable to the downloaded file or merge the context into your existing config file (.kube/config) if you need to connect to multiple clusters.

At this stage you should be ready to start deploying containers and this is where you will need some Kubernetes knowledge. Let's verify a few things to see if everything is in order....

  • From your CLI, type kubectl config get-contexts. This will show you which clusters you'll have access to. One is the Karbon cluster and the other is my docker-for-desktop setup on my Macbook, which is defult context at this stage.


  • Switch to the Karbon context with command "kubectl config use-context KarbonPilot4-context"
  • Run kubectl cluster-info and you'll get the address where Kubernetes Master is running


We are pretty much ready to deploy a container on our Nutanix platform. The best way to deploy containers is by having all your code in a yaml file but that is outside of scope for this post.

  • Run "kubectl create deployment nginx --image=nginx" to create deployment
  • Verify with "kubectl get deployments"
  • Get more info on Nginx deployment "kubectl describe deployment nginx"
  • Make the container accessible "kubectl create service nodeport nginx --tcp=80:80"
  • Check if your service was created with "kubectl get svc"


  • Open a browser window. Pick the public IP of any of the master/slaves nodes followed by the port above. 
  • Your container is available


I am hoping to go into a bit more detail about some of the other features that Karbon uses in a future post


Tuesday, 16 April 2019

Creating tag based custom groups in vROPS

vCenter tags are a great way of categorizing your VM in vCenter and it will allow you to all kinds of wonderful things on the reporting front. You can search the vCenter inventory based on tags or you could use them with PowerCLI for your reporting needs. Tags also integrate with other VMware products and one of these is vROPS.

One of the things I use tags for is to create custom groups in vROPS. Custom groups will allow me to group all VM in a service and saves me from remembering the VM name and searching the vROPS inventory.

I assume you know how to create vCenter tags but in case you don't here is how you can go about it:


  • Select VM and right click. Select Tags and Custom attributes
  • Click assign tag
  • Click the tag with green plus sign
  • Enter name and select a category. 
  • Select the service and click OK

In vROPS, undertake the following steps

  • Go to Environment > Groups and Applications > Custom Groups
  • Click Green plus sign.
  • Enter name and set policy to environment.
  • Check "Keep group membership up to date"
  • Set object type to vCenter Adapter | Virtual Machine
  • Select Properties and Summary|vSphere Tag. Specify "is" from 3rd dropdown box
  • Select your tag
  • Click OK


You will now notice that your custom group is available which you can use for monitoring purposes and the likes.


If you happen to find that you cannot select your tags in vROPS then ensure that the credentials you use for your collector has read-only permissions at a global level.

Monday, 1 April 2019

Nutanix on Huawei x86 platform

Just recently it was announced that Huawei has been certified as a platform to run the Nutanix AOS software. With this the end user gets yet another platform to choose from if they want to run software only. Huawei joins the likes of Dell, Lenovo, HP, Cisco, Fujitsu, Inspur and then some. For those not familiar with software only it really is a bit like how we used to deploy vSphere in the old days.
You buy the software and pick any hardware you like as long as it is on the compatibility list.

It is is still early days in the Huawei\Nutanix relationship and right now only one model had been certified, the 2288 V5 with a 12 LFF disk configuration. This model is suitable for .storage heavy and server virtualization workloads.
Another model, comes with a 25 SFF disk configuration and is suitable for VDI, Exchange and SQL. I imagine that before too long other models will be available.
Huawei uses these models for their own HCI solution and the package is marketed as the Fusioncube 2000.


Software wise you have the same options as you do with OEM solutions. Pick whatever suits your needs; Starter, Pro, Ultimate. In addition you can by the add-on licenses you require.


So how do you go about support when your Huawei Nutanix cluster is up and running? Thanks for asking. Basically you will contact Nutanix support for anything software related and Huawei for anything hardware related. If you are not sure you can just call your trusted Nutanix SRE's.


Why would I consider anything other than NX knowing it has been treating me very well and rarely misses a beat? The main thing is that money is always tight and if I can get a few more nodes for the same price than I really need to look at it. A high level investigation showed me that the Huawei solution was overall cheaper than any other software only solution I looked at and it also came in cheaper than the trusted NX solution. In saying that, a decision should never be made just on cost. As Benjamin Franklin said, the bitterness of poor quality will remain long after the sweetness of low price is forgotten. Does this mean that Huawei (or any other non-oem vendor) is poor quality? Absolutely not!

I was lucky enough to visit Huawei's factories in Shenzen and Chengdu earlier this year and I have to say that I was amazed by what I saw. With an research and development force of 80,000 strong and a reinvestment of 10% of their profits into R&D nothing is going to stop them. Huawei is a freight train coming your way and I don't think it will be stopped.

Am I going to implement Nutanix on Huawei X86? Not at this point but I will keep a very close eye on further developments and who knows, it may happen down the line. For now though, I will stick with NX and here are my reasons why:


  • Support. Never have I experienced the support I get from Nutanix. I don't want to deal with 2 different channels. Some time ago I opened a P1. Probably was more a P2 but hey, I am paying for support so I thought I would test it out. From logging SR to having a webex session going it took 6 minutes. 6 minutes!! That is unprecedented. I want this support across the board.
  • Lifecycle Manager: This tool has come such a long way and it is still getting better with each release. It is one of my favorite features and I am not willing to give it up. I assume  LCM on non-oem will get more parity as times goes by. This is not just an issue on Huawei but on the other vendors too.
  • I love the density I get from the NX series and we are always short on rack space.
  • I cannot extend my existing NX clusters with other platforms and want to limit silos.

These are my thoughts anyway. Have a look at Huawei's technologies if you have the chance, they do it all, or visit China when the opportunity comes up. It was an eye opener for me and left pleasantly surprised.