Your Nutanix block has made it all the way to the central North Island of New Zealand and you have unpacked the block, took the box for a ride around town and installed the block into the rack. Your new Nutanix block is factory shipped with the KVM hypervisor but your environment's hypervisor of choice is VMware ESXi. This is were Nutanix Foundation comes in. In a previous
post I explained how to install the Nutanix Foundation VM. This post will cover how to re-image your nodes.
Once you have logged into your Foundation VM you need to click the Nutanix Foundation icon which make use of the Firefox icon.
This will take you to the Foundation GUI. This interface will walk you through the following 4 steps:
- Global Config
- Block and Node Config
- Node Imaging
- Clusters
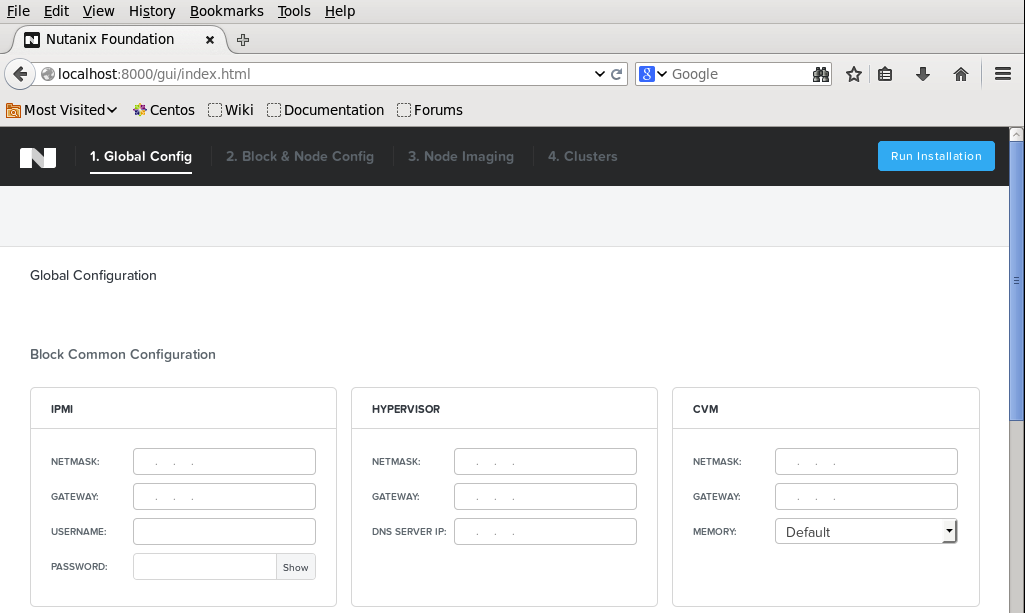
Global Config
The global configuration screen allows you to specify settings which are common to all the nodes you are about to re-image. At the bottom you see a multi-home checkbox. This only needs to be checked when your IPMI, hypervisor and CVM are in different subnets. Since it is best practice to keep these in the same subnet it is advised you do and thus there is no reason to tick the box.
In this case you will enter the same netmask and gateway. For IPMI, enter the default ADMIN\ADMIN credentials. You can change this later. Enter your organisational DNS server under hypervisor. You probably make use of another DNS server and you can add this one later too.
The CVM memory can be adjusted as required. In my case this is 32 GB
Block and Node Config
The block and node config screen allows you to discover the new nodes. Remember that your Foundation VM needs to have an IP in the same subnet as the new nodes and that IPv6 needs to be supported. The new block and its new nodes should be automatically detected if all pre-requisites have been met. If not, you can try the discovery again by clicking the retry discovery button.
Enter the IP addresses you want to use for the IPMI, hypervisor and CVM interfaces for each discovered node. You can also set the desired name for your hypervisor host
Node Imaging
The node imaging allows you to specify the NOS package and hypervisor you want to use for re-imaging your node. You should ensure that the NOS and hypervisor version you specify is the same as the ones in use on your cluster. It is not strictly necessary but it makes life a bit easier. You will need to upload your NOS and hypervisor installer files to the Nutanix Foundation VM. By default, there is enough disk space available on the foundation VM to hold at least one of each. It is important that the files are stored in the correct location on the VM. You can upload them from your laptop to the VM with the following SCP commands:
scp -r <NOS_filename> nutanix@foundationvm:foundation/nos
scp -r <hypervisor_filename> nutanix@foundationvm:foundation/isos/hypervisor/<hypervisorname>
Clusters
As I am actually not creating a cluster but planning to expand an existing one I do not specify a new cluster. I do click the run installation button and I get a message that informs me the imaging will take around 30 minutes.
The installer will kick off once you click the proceed button.
Just sit back and wait for the process to complete.